Reference
If you have a reference floor plan, you can use this feature to add your image to the scene and use it as a guide for generating walls and other elements. In this tab, you'll find several options to help you work with your reference image.
Reference Options
-
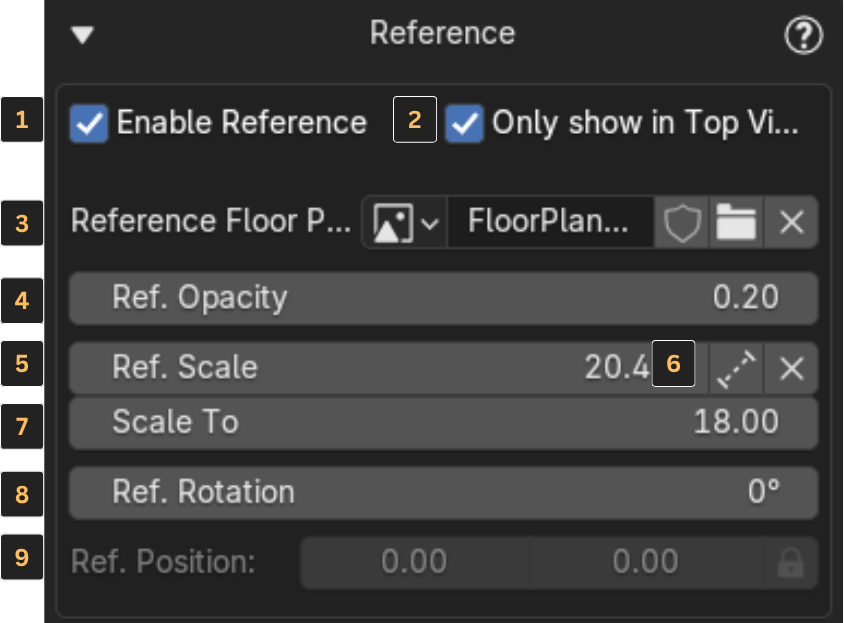
Toggle Reference On/Off – Show or hide the reference image in the scene.
-
Show Reference Only in Top Orthographic View – Display the image only when you're in top orthographic view, helping keep the workspace clean.
-
Select Image from Your Computer – Choose an image file from your PC to use as a reference.
-
Reference Image Opacity – Adjust the transparency of the reference image.
-
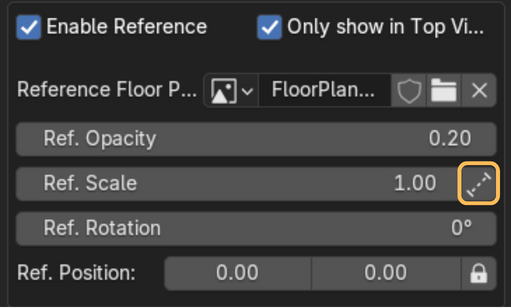
Scale Reference Image – Manually scale the reference image.
-
Scale Reference to a Specific Measurement – Resize the image based on a real-world measurement (explained in more detail below).
-
Rotate Reference – Rotate the reference image to align it properly with your scene.
-
Position and Lock Reference – Move the image into place and lock it to prevent accidental changes.
Scaling to Real-World Dimensions
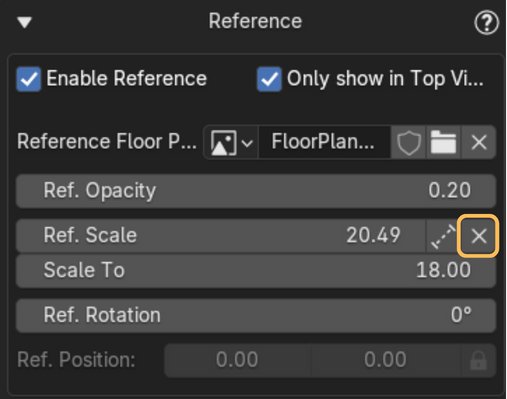
To scale your reference image to real-world dimensions, use the Ref. Scale option:
- Click the distance icon to the right of Ref. Scale.
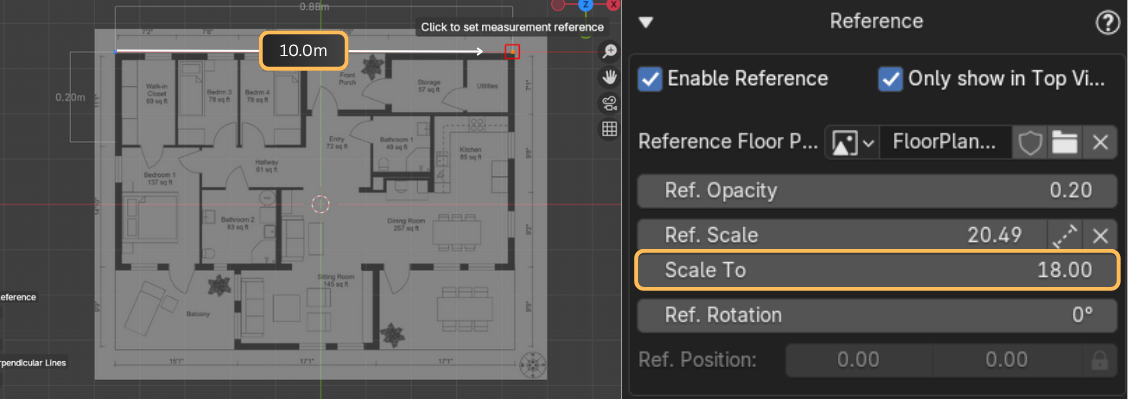
- Click on a first point in your image, ideally one end of a wall for which you know the exact length, then click the other end of that wall (Indicated with arrows in the next image, you will also see the current length between the points).
-
A new parameter called Scale To will appear below Ref. Scale. Enter the correct real-world distance for that wall segment (in meters or inches), and the image will automatically scale so that segment matches the specified length.
-
Click the X icon to the right of Ref. Scale to apply the new scale. That's it, your reference image is now at real-world scale.