Space
In this tab, you'll create your main structure, the exterior walls of the house.
Space Types
Choose from three types of space you can create:
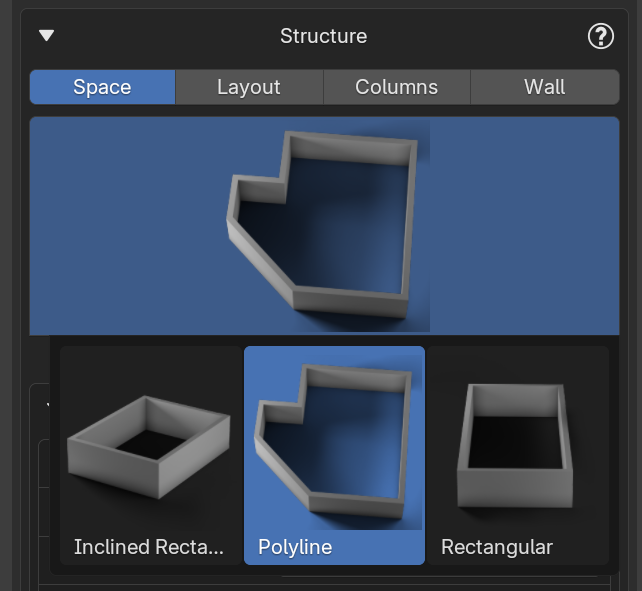
- Inclined Rectangle – Creates a rectangular mesh at a specified angle.
- Polyline – Allows you to draw any shape you want, point by point.
- Rectangular – Creates a standard rectangular structure.
Initial Setup
You can set the Project Name before you begin. At this stage, you can also define the floor height and the thickness of exterior and interior walls, though you'll still be able to adjust these settings later.
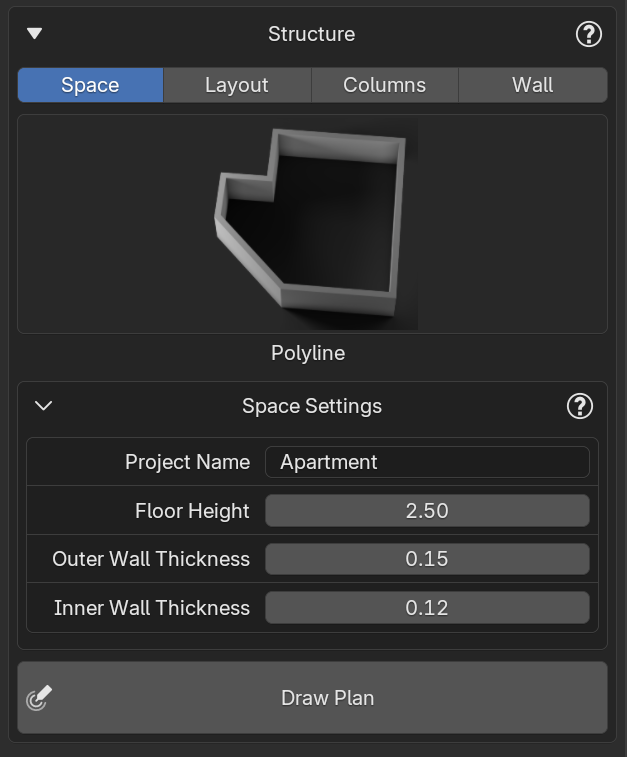
Drawing Your Structure
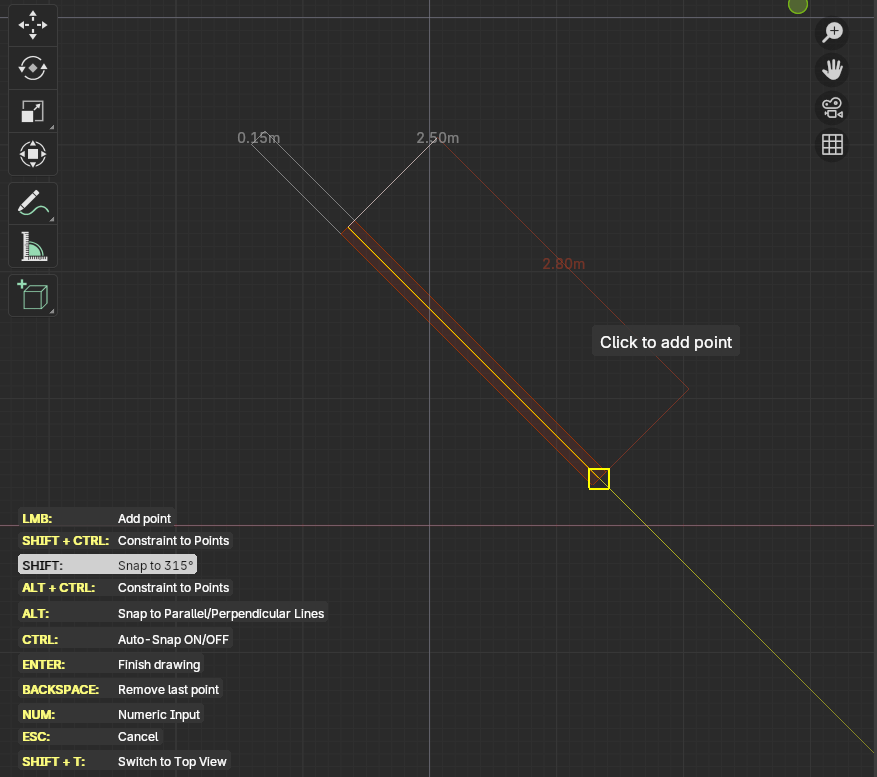
Once you've set these parameters, click Draw Plan to start creating your structure. When you start placing points, you'll see a list of keyboard shortcuts in the bottom-left corner of the viewport. These shortcuts are useful for snapping lines to specific angles or existing points, deleting points, or finishing the structure.
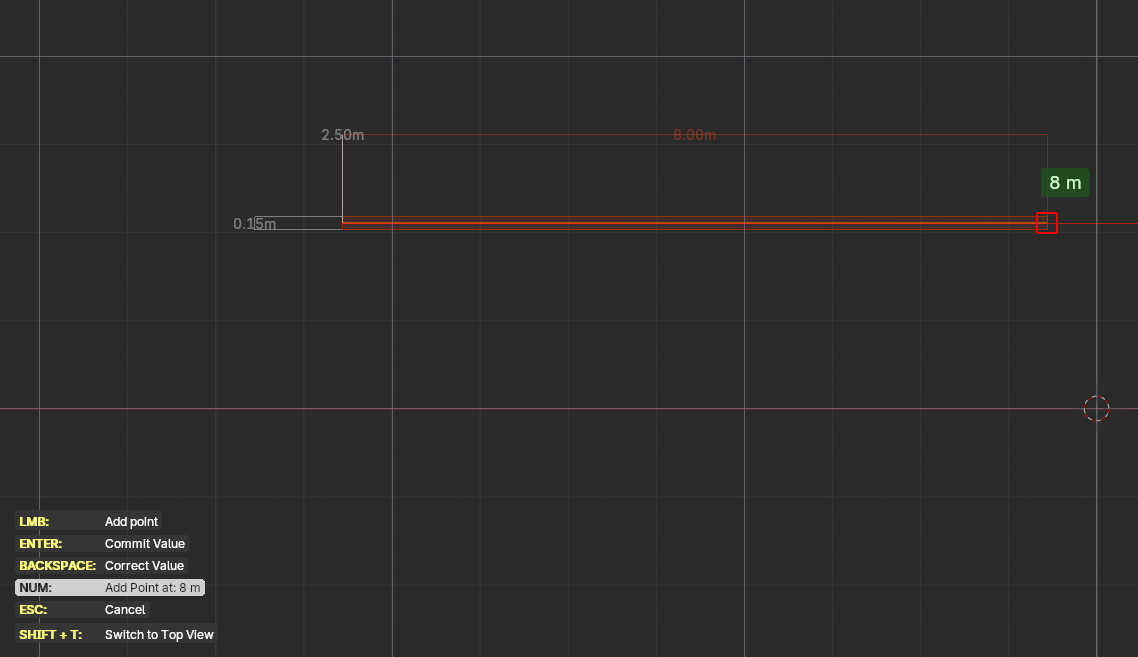
To create edges with an exact measurement, you can use the number keys on your keyboard. First, set the direction of the wall by moving your mouse, then enter the desired length, press Enter, and a new point will be placed at that position.
IMPORTANT: Do not connect the last two points of the wall, just leave the space where the final edge would go empty. The add-on will automatically fill in that gap for you.
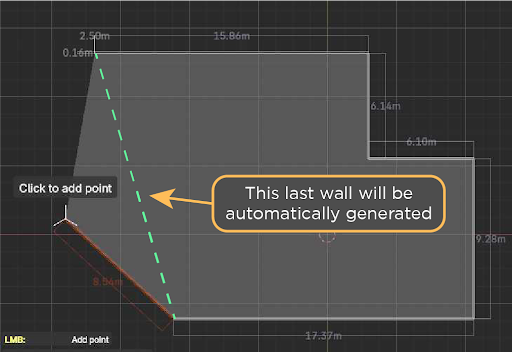
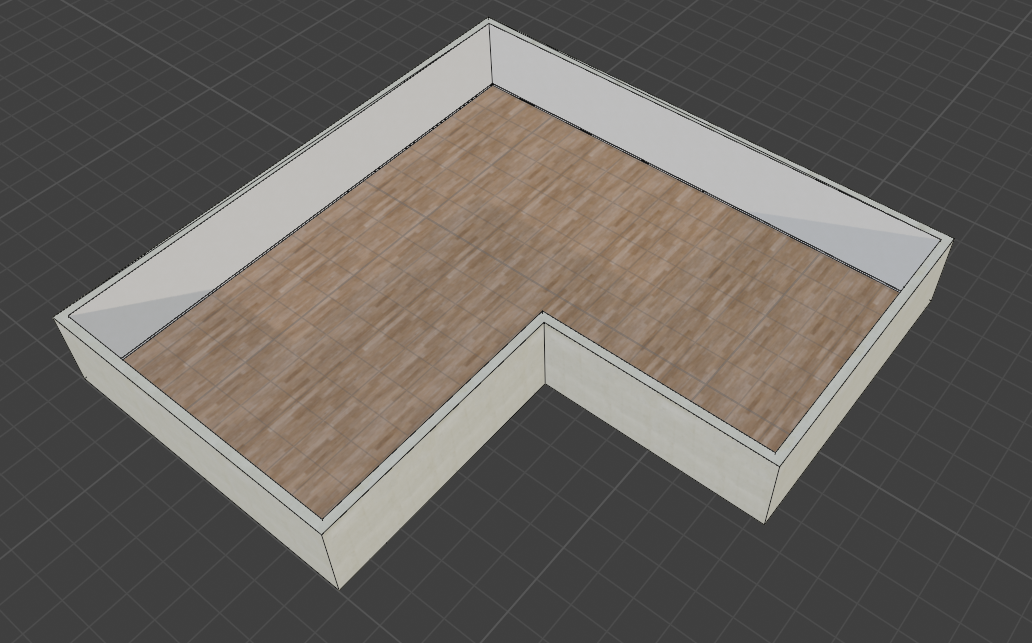
Once you're done, press Enter to see your structure generated.
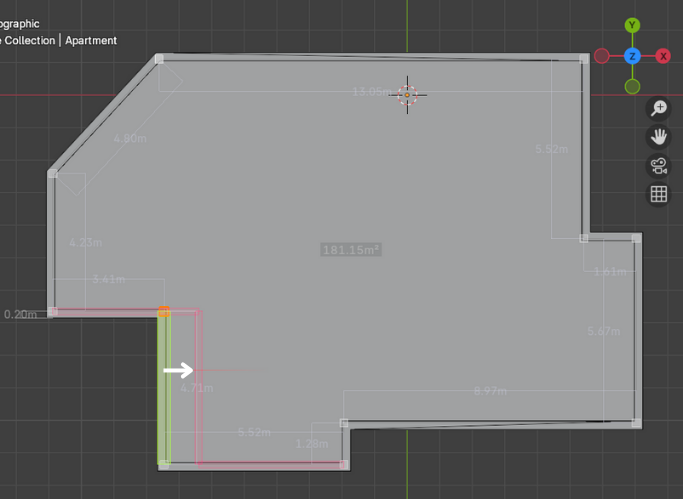
After creating the main floor plan, you can edit the wall corners and edges using the Reposition Walls at Level button.
You can then proceed to add interior walls from the Layout tab.